How-to videos are great tools to engage with customers and online communities while also incorporating more video into your digital platforms. They provide an engaging way to share helpful information with your target audience, position your business as experts in your field, and generally promote your business brand.
What you need to consider when shooting a how-to video:
- Choosing your topic
- Setting up your camera
- Setting the stage
- Additional equipment
- Shoot for the edit
- Sharing your videos
Choose your topic
Make sure your topic is easy to explain through video. Not all topics lend themselves to how-to videos — you’ll ideally want to choose a topic that’s easily broken down into pieces and remains visually interesting. For example, you can certainly make a how-to video on physics theories, but those are harder for an audience to absorb regardless of how you explain them. Simpler topics such as cooking recipes and DIY crafts are much simpler to explain and easier to understand.
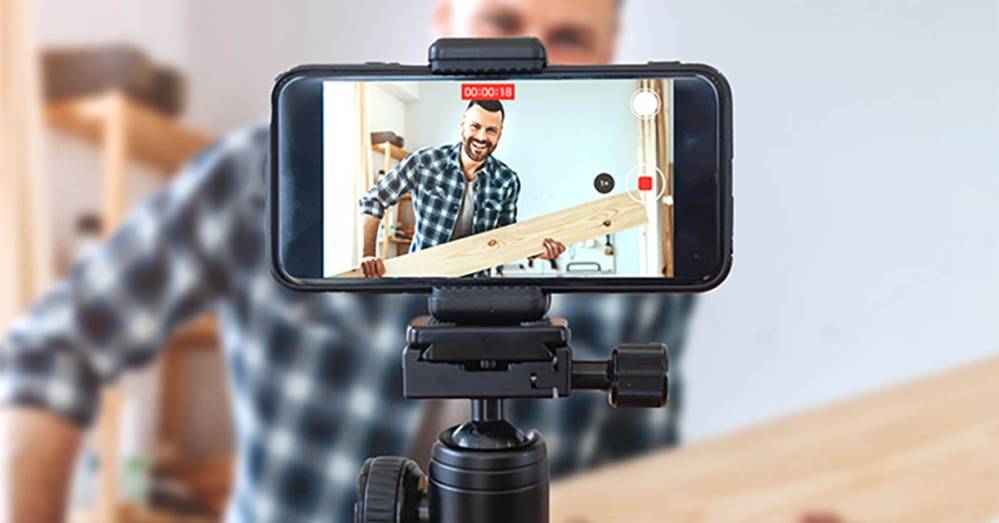
Setting up your camera
Shooting a how-to video isn’t as complicated as you’d think. You don’t need to own a fancy, expensive camera to create a quality video — your iPhone will work just fine! They’re surprisingly more advanced than certain cameras you’ll find at an electronics store given their clear capture, pixel quality, and editing capabilities.
Here are some basic steps to follow when you shoot a how-to video with your iPhone:
- Shoot horizontal – Shooting horizontally (side to side, not top to bottom) gives your viewers the most familiar view. (Picture your TV or movies people are used to watching.) It’s not important to have a floor or ceiling in view during your video — shooting horizontally offers a more aesthetically pleasing view and will help prevent the need for zooming in or cropping during the editing phase.
- Storage – Make sure you have enough storage on your phone. It’s fine if you don’t know exactly how much storage your how-to video requires, but you should clear up space on your phone if it’s close to being full. You can do this by deleting duplicate videos, photos or even apps you rarely use.
- Do-not-disturb – Set your phone to do-not-disturb before you start filming. Let’s say your how-to video is going well and you don’t want to break between shots, or maybe you’re in a time crunch and want to shoot it in one sitting. Can you imagine how frustrating it would be if a notification or call sound pops up in the middle? Setting your phone to do-not-disturb will eliminate any worry of untimely interruptions.
- Clean your lens – All too often, you’ll see videos that look fuzzy or smudged. Take two seconds to clean your camera lens before you start shooting.
- Pro Tip: Lock exposure – Lock your phone’s exposure to ensure high video quality from start to finish. Photo capture is fine without locked exposure, but videos have a tendency to adjust and readjust as various movements happen throughout filming. This is distracting for viewers. You’ll want to lock exposure before you press record by holding your finger down on a subject and pressing “AE/AF Lock” after it appears in a yellow box.
[Related: How to Make the Most of Your Facebook Page]
Setting the stage to shoot your how-to video
Background
Make sure your settings are video-ready by taking a careful look at your shot and removing everything that doesn’t belong. Clean up any clutter or items that aren’t relevant to your how-to video, anything that could be distracting to the viewer.
Audio
Audio is equally as important as your actual visual footage. Too much static, echo, or sound impairment can cause viewers to click off your video in seconds. Be sure you’re close enough to your phone or camera, or are speaking loudly enough to be heard.
Lighting
You’re unlikely to film in a setting that has too much light — it’s more common to have a setting that’s not light enough. Not enough lighting results in grainy and gloomy videos that are usually uninviting. Plus a dark video makes it harder for the viewer to follow what you’re teaching… and if they’re having trouble following, they’ll probably click to something else.
Here are some lighting options:
- Natural light – Natural light is typically the most flattering, but clouds and other environmental elements can make it tricky to maintain the lighting you want throughout your video.
- Ring lights – As more people appeared on camera during COVID-19, ring lights became more and more popular. They’re great for footage that contains a single person or close-up shots… but they’re not as good for filming large spaces or wide-angled shots.
- LED lights – LED kits, often small rectangular lights, provide a studio-like setup with lighting that results in crisp, how-to videos.
Composition
The composition of your how-to video footage should follow the common rule of thirds: picture two vertical lines and two horizontal lines that intersect and create six equal-sized cubes in your shot (picture the Brady Bunch). The most important elements of your video should occur at the intersections of these lines to create a sense of balance in your footage. This gives your subject space on all sides for appropriate composition.
[Related: How to Market Your Small Business]
Additional equipment for how-to videos
In addition to your camera, mics and any lighting equipment you use, you’ll need:
- A tripod – Tripods allow your footage to remain still and steady and enable you to shoot alone. Today, very simple tripods for your phone are inexpensive and easily available online or in a nearby electronics store.
- A charger – Videos require much more battery life and storage space than taking photos. Make sure you have a charger handy if you need to charge your phone.
Shoot for the edit (get all the footage you’ll need)
Keep your editing process in mind when shooting your video – it’ll save you save in editing… and should keep you from having to go back and shoot more footage. Here are some simple filming tips you should follow to ensure efficient editing:
- Capture “B-roll” – B-roll is extra footage that’s meant to enrich your story. When you watch a video, B-roll is all the footage you see that’s not the person talking – close-up details, additional footage of the service or product you’re describing in the video, or anything else that can make your video more interesting for your viewer.
- Leave a buffer – Buffers are essentially extended footage at the start and end of scenes (also called “handles”). Leaving buffers at the beginning and ends of each scene helps connect scenes during the editing process and prevents important shots from being cut too close.
- Make notes of your best clips – You’ll usually shoot multiple takes of the video, or at least some scenes, to make sure you get a good shot. It also makes the editing process easier if you can choose from a couple different takes. Creating visual cues at the end of the takes that went well will save immense amounts of time when editing. You can skim directly to your visual cues instead of reviewing every second of unusable footage.
Sharing your how-to videos
It goes without saying that you don’t want to create a great How-To video only to have no one see it. You need to post your videos on your website (Hibu can help if you have a Hibu Website), on your social media, YouTube, and elsewhere around the web – you can even email them to customers to and prospects as a helpful service.
Don’t wait – get out there and start creating professional looking videos that show off your expertise and build your brand. There’s no excuse… now that you know how to!